
license: apache-2.0
base_model:
  - Qwen/Qwen-Image-Edit-2509
pipeline_tag: image-to-image
widget:
  - text: apply the image 2 full costume to image 1 singing girl
    output:
      url: workflow-demo2.png
  - text: use image 2 city night view as background for image 1
    output:
      url: workflow-demo.png
  - text: use image 2 as background for image 1 fairy
    output:
      url: workflow-demo3.png
tags:
  - gguf-connector
  - gguf-node
qwen-image-edit-plus-gguf
- run it with
gguf-connector; simply execute the command below in console/terminal
ggc q8
GGUF file(s) available. Select which one to use:
- qwen-image-edit-plus-v2-iq3_s.gguf
- qwen-image-edit-plus-v2-iq4_nl.gguf
- qwen-image-edit-plus-v2-mxfp4_moe.gguf
Enter your choice (1 to 3): _
- opt a
gguffile in your current directory to interact with; nothing else
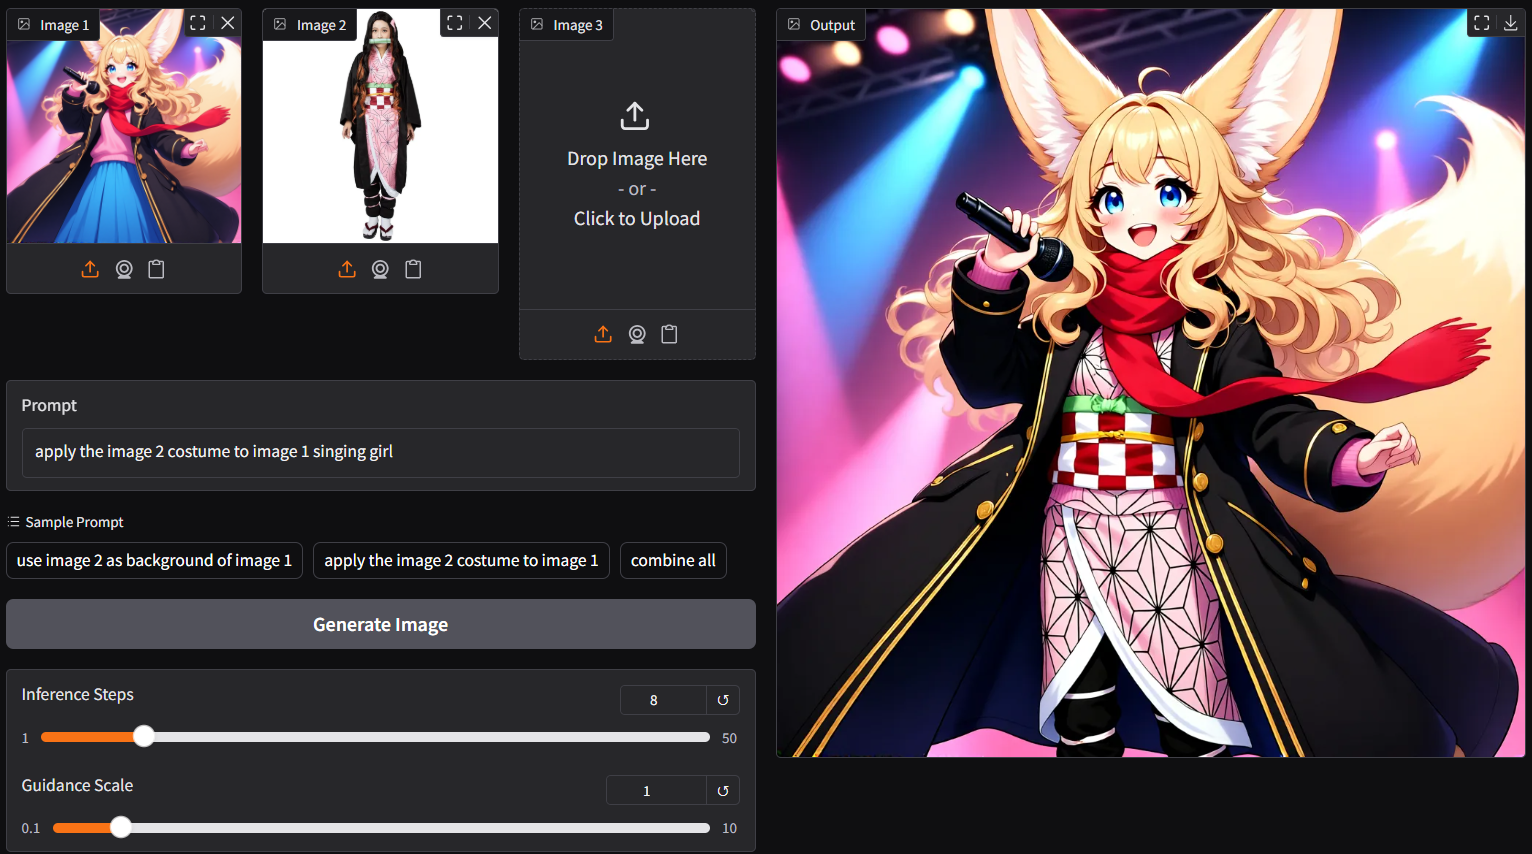
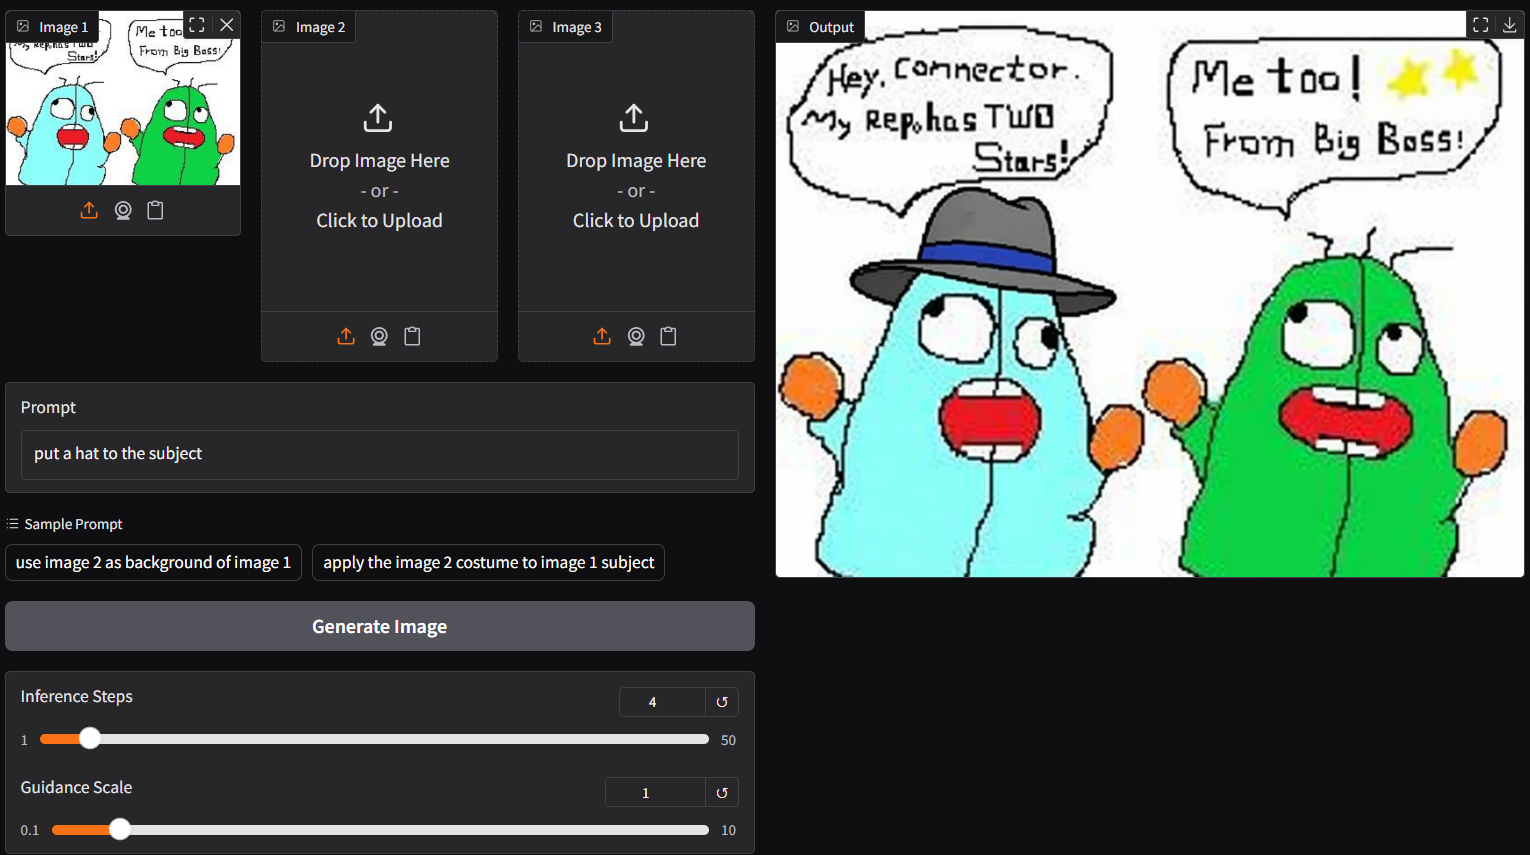
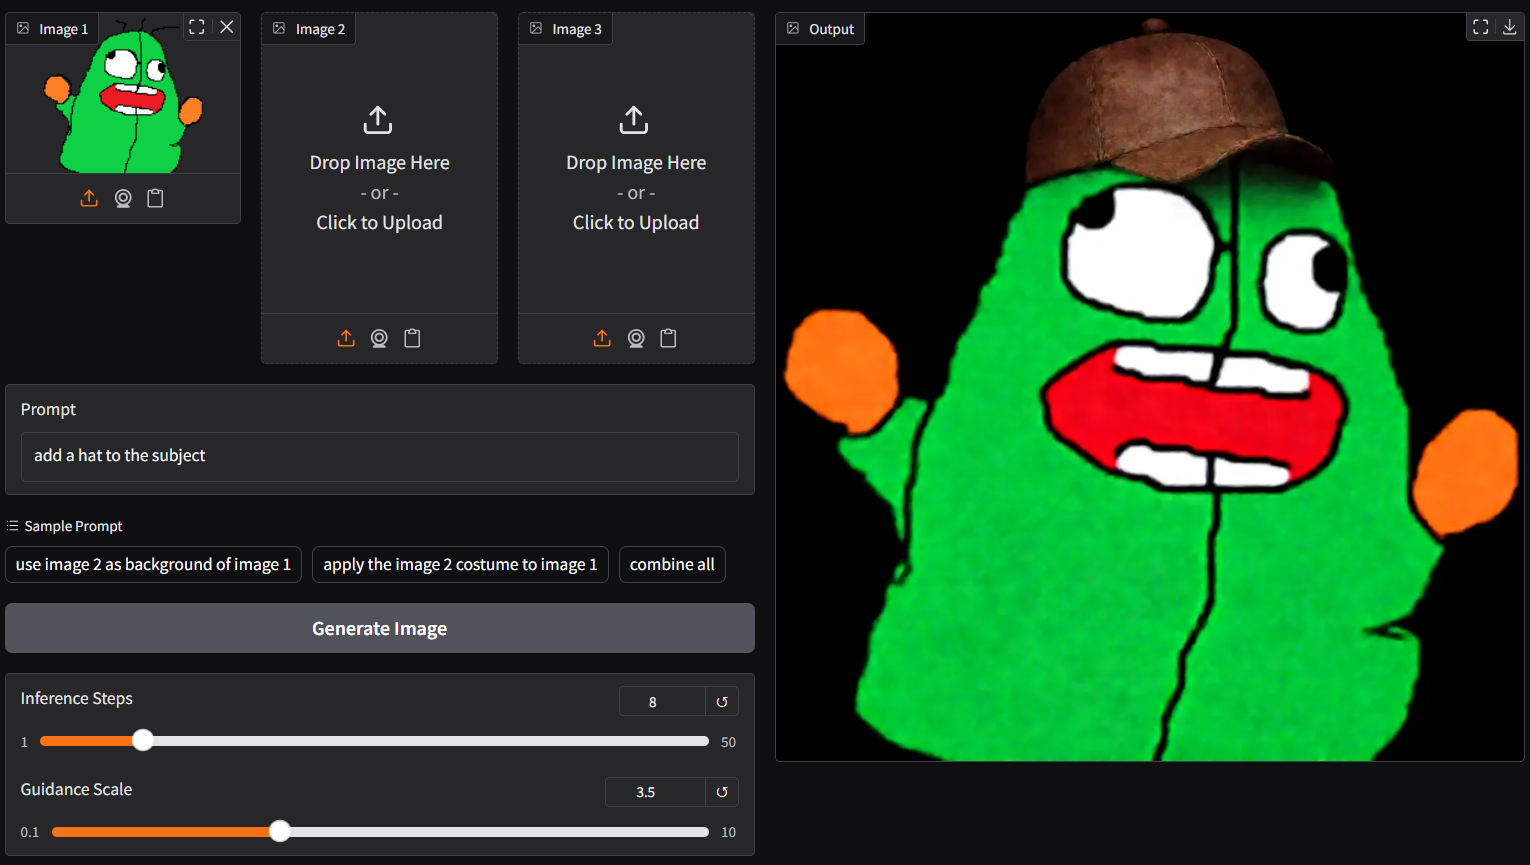
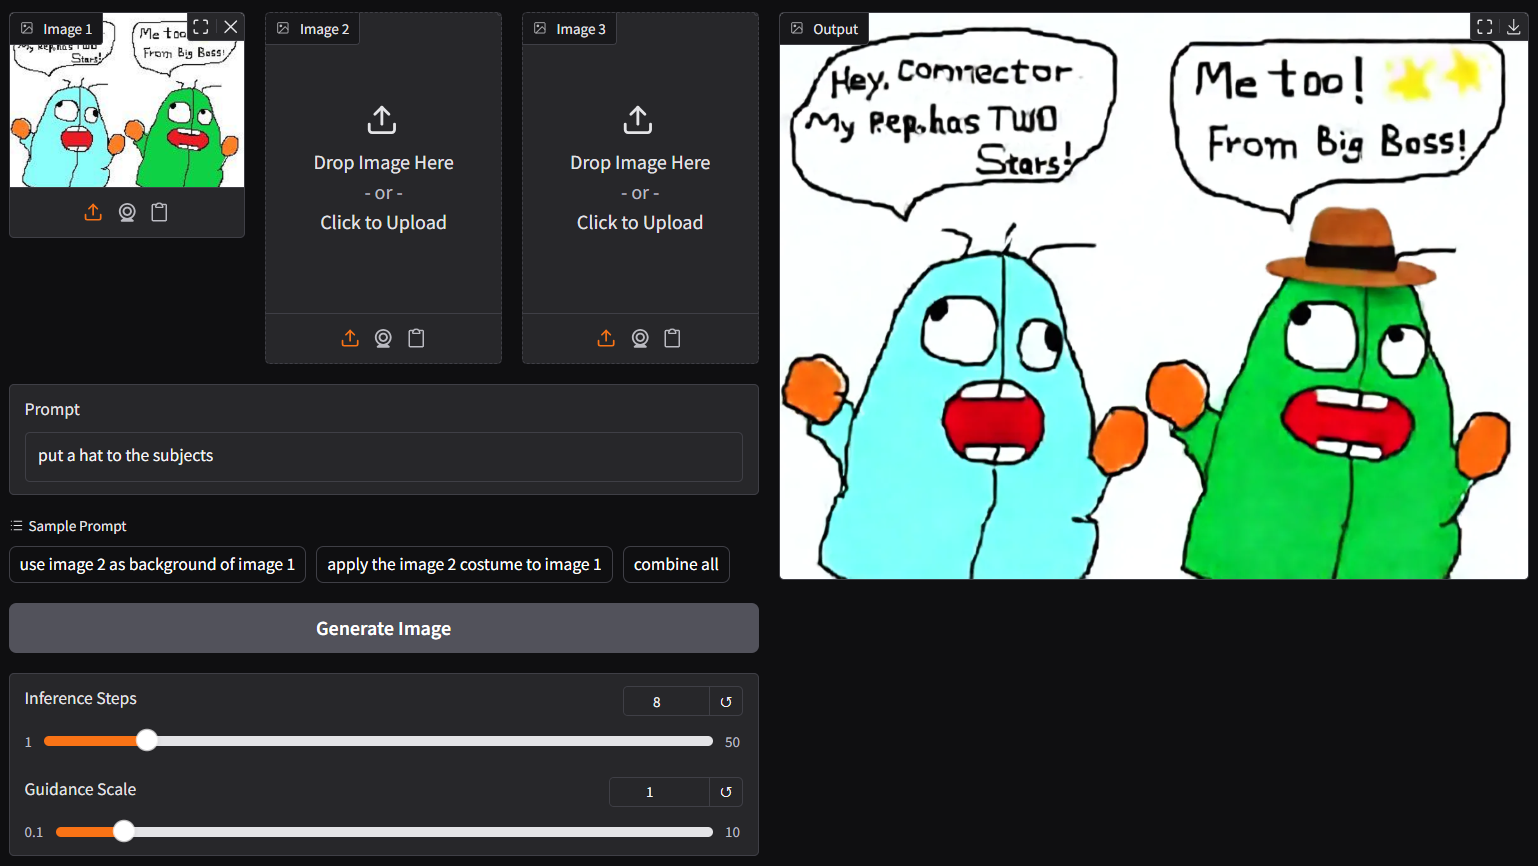
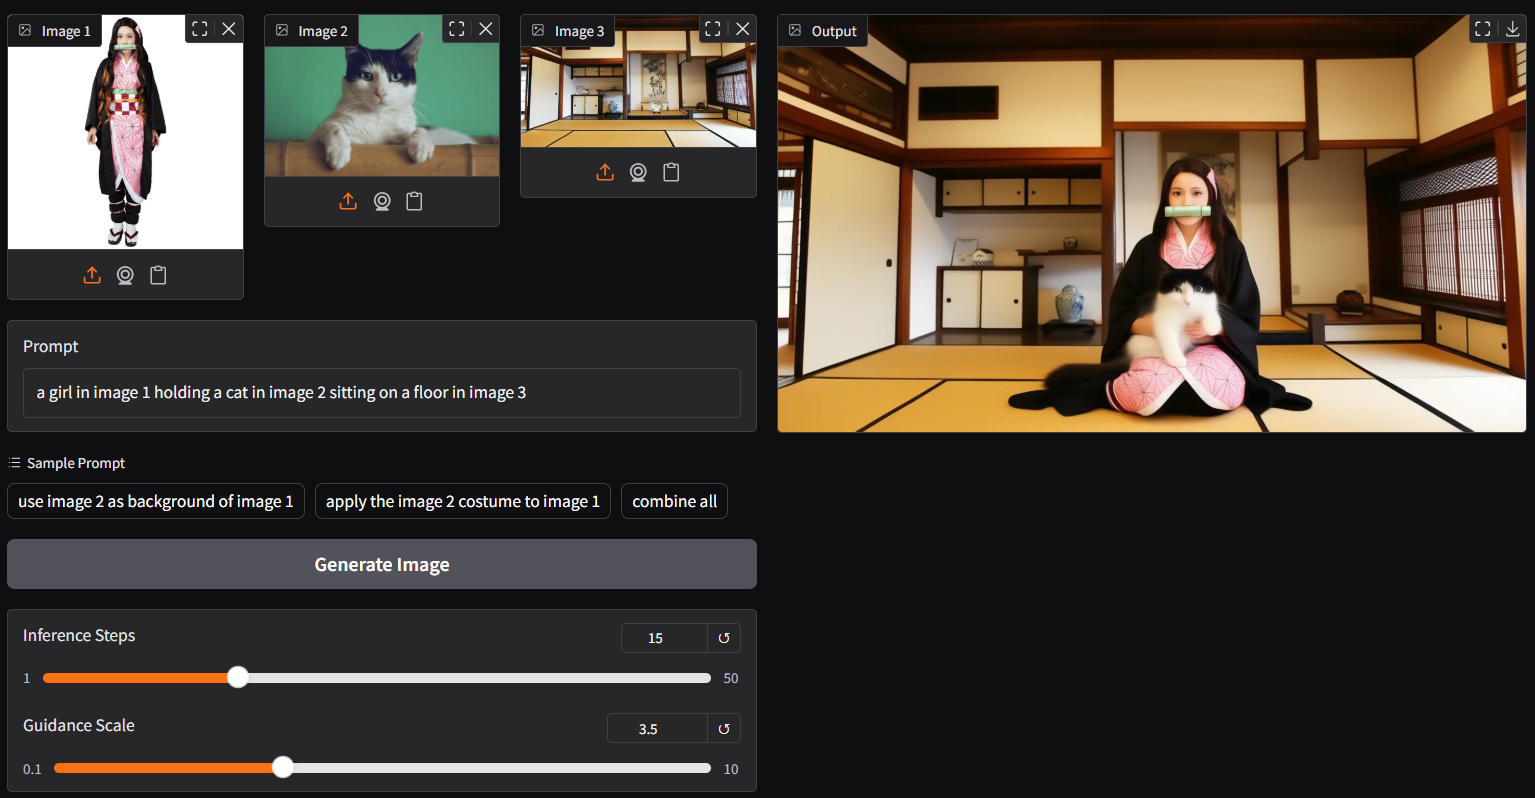
ggc q8accepts multiple image input (see picture above; two images as input)- as lite lora auto applied, able to generate output with merely 4/8 steps instead of the default 40 steps; save up to 80% loading time
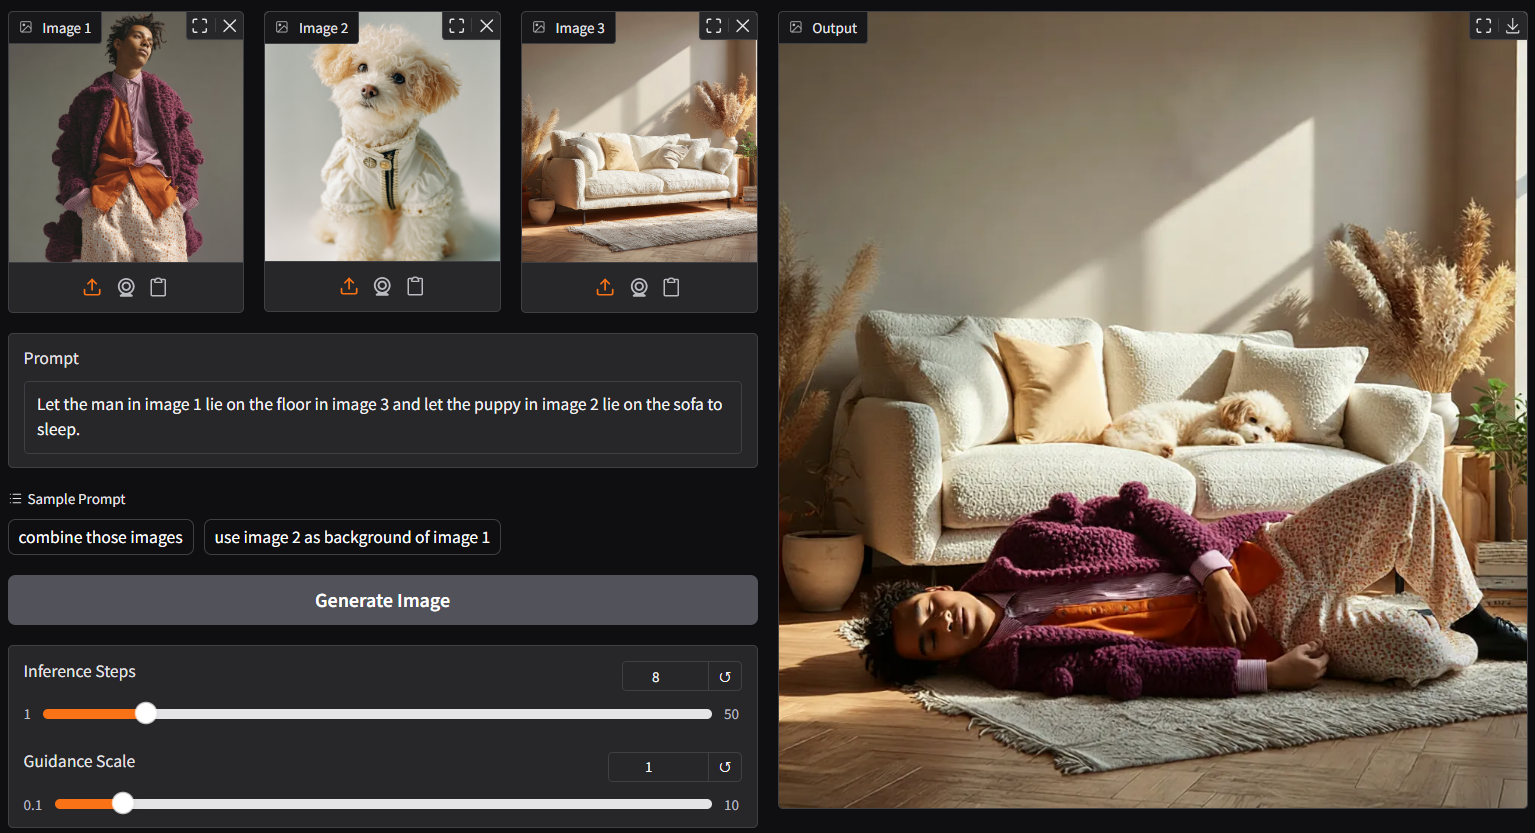
- up to 3 pictures plus customize prompt as input (above is 3 images input demo)
- though
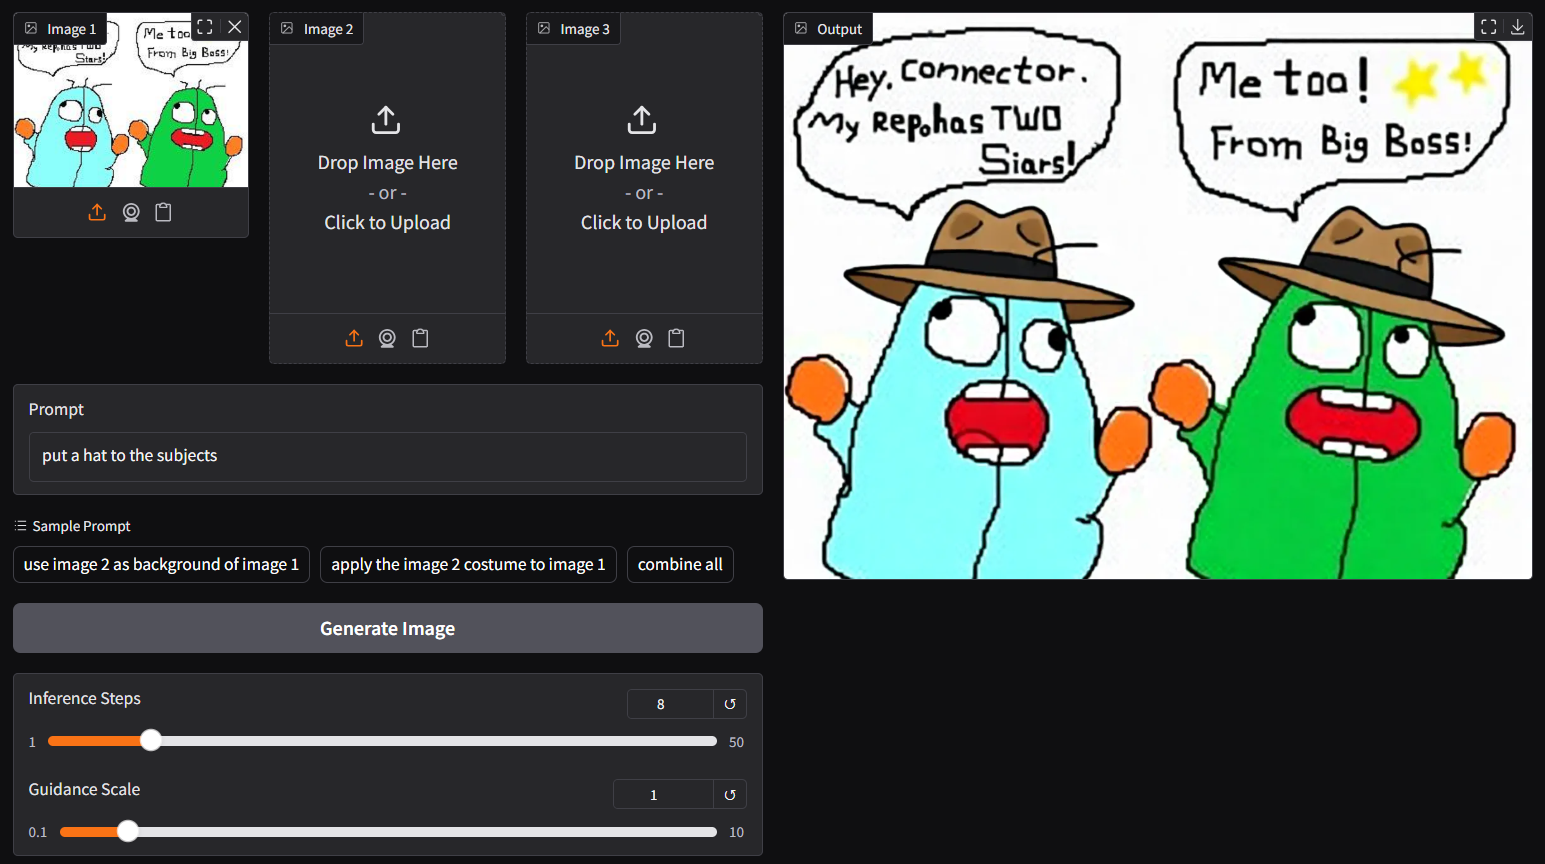
ggc q8is accepting single image input (see above), you could opt the legacyggc q7(see below); similar to image-edit model before
ggc q7
run it with gguf-node via comfyui
- drag qwen-image-edit-plus to >
./ComfyUI/models/diffusion_models - *anyone below, drag it to >
./ComfyUI/models/text_encoders - drag pig [254MB] to >
./ComfyUI/models/vae
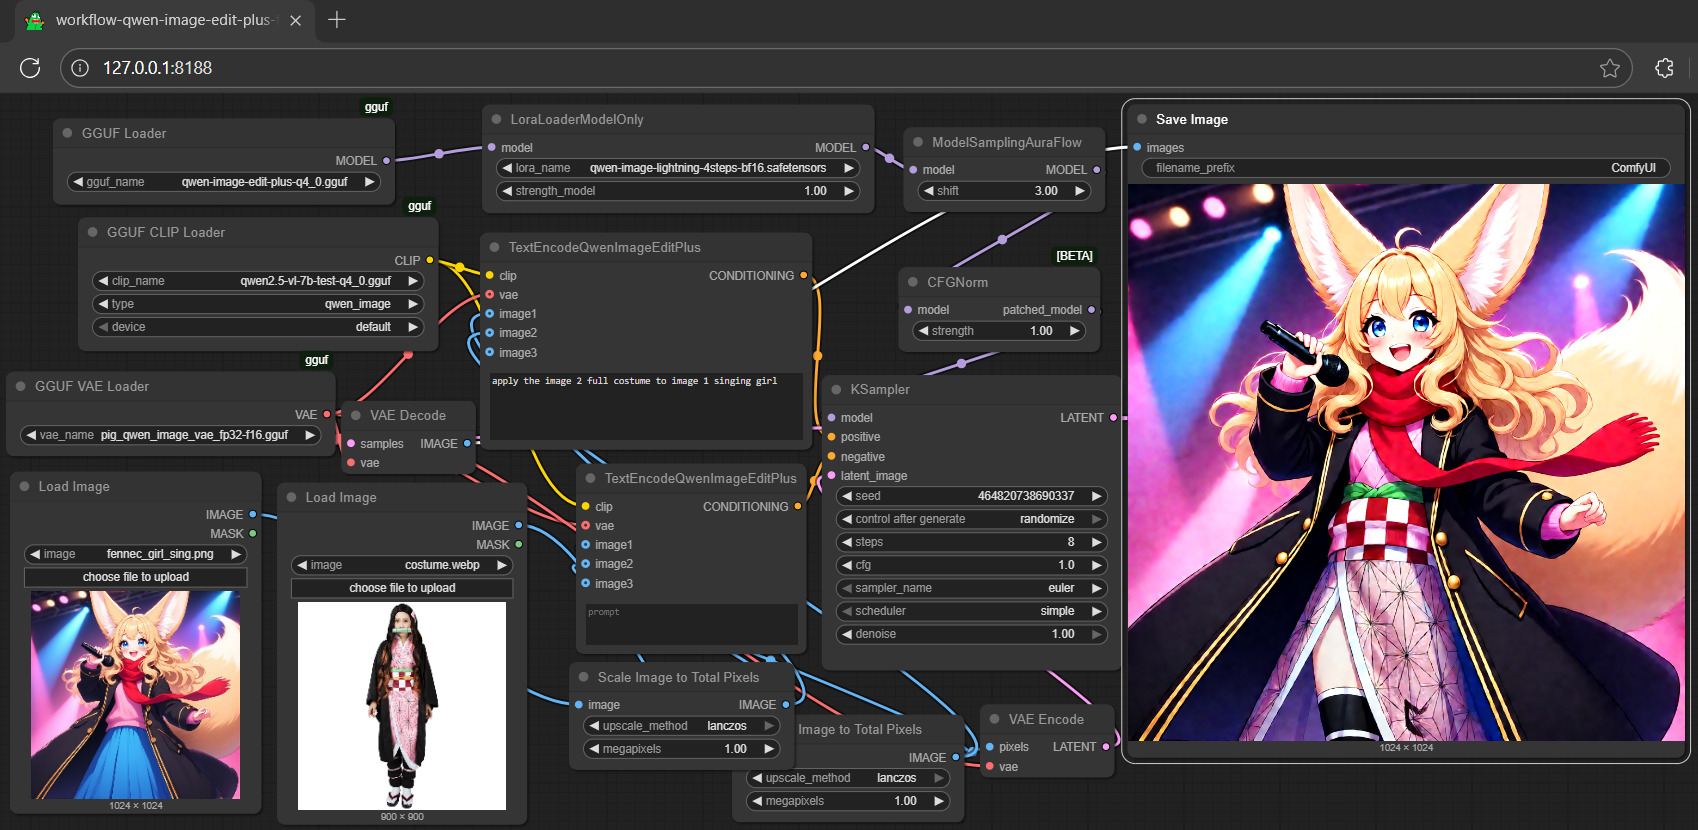

- Prompt
- apply the image 2 full costume to image 1 singing girl

- Prompt
- use image 2 city night view as background for image 1

- Prompt
- use image 2 as background for image 1 fairy
run it with diffusers
- might need the most updated git version for
QwenImageEditPlusPipeline, should after this pr; for i quant support, should after this commit; install the updated git version diffusers by:
pip install git+https://github.com/huggingface/diffusers.git
- simply replace
QwenImageEditPipelinebyQwenImageEditPlusPipelinefrom the qwen-image-edit inference example (see here)
import torch, os
from diffusers import QwenImageTransformer2DModel, GGUFQuantizationConfig, QwenImageEditPlusPipeline
from diffusers.utils import load_image
model_path = "https://huggingface.co/calcuis/qwen-image-edit-plus-gguf/blob/main/qwen-image-edit-plus-v2-iq4_nl.gguf"
transformer = QwenImageTransformer2DModel.from_single_file(
model_path,
quantization_config=GGUFQuantizationConfig(compute_dtype=torch.bfloat16),
torch_dtype=torch.bfloat16,
config="callgg/image-edit-plus",
subfolder="transformer"
)
pipeline = QwenImageEditPipeline.from_pretrained("Qwen/Qwen-Image-Edit-2509", transformer=transformer, torch_dtype=torch.bfloat16)
print("pipeline loaded")
pipeline.enable_model_cpu_offload()
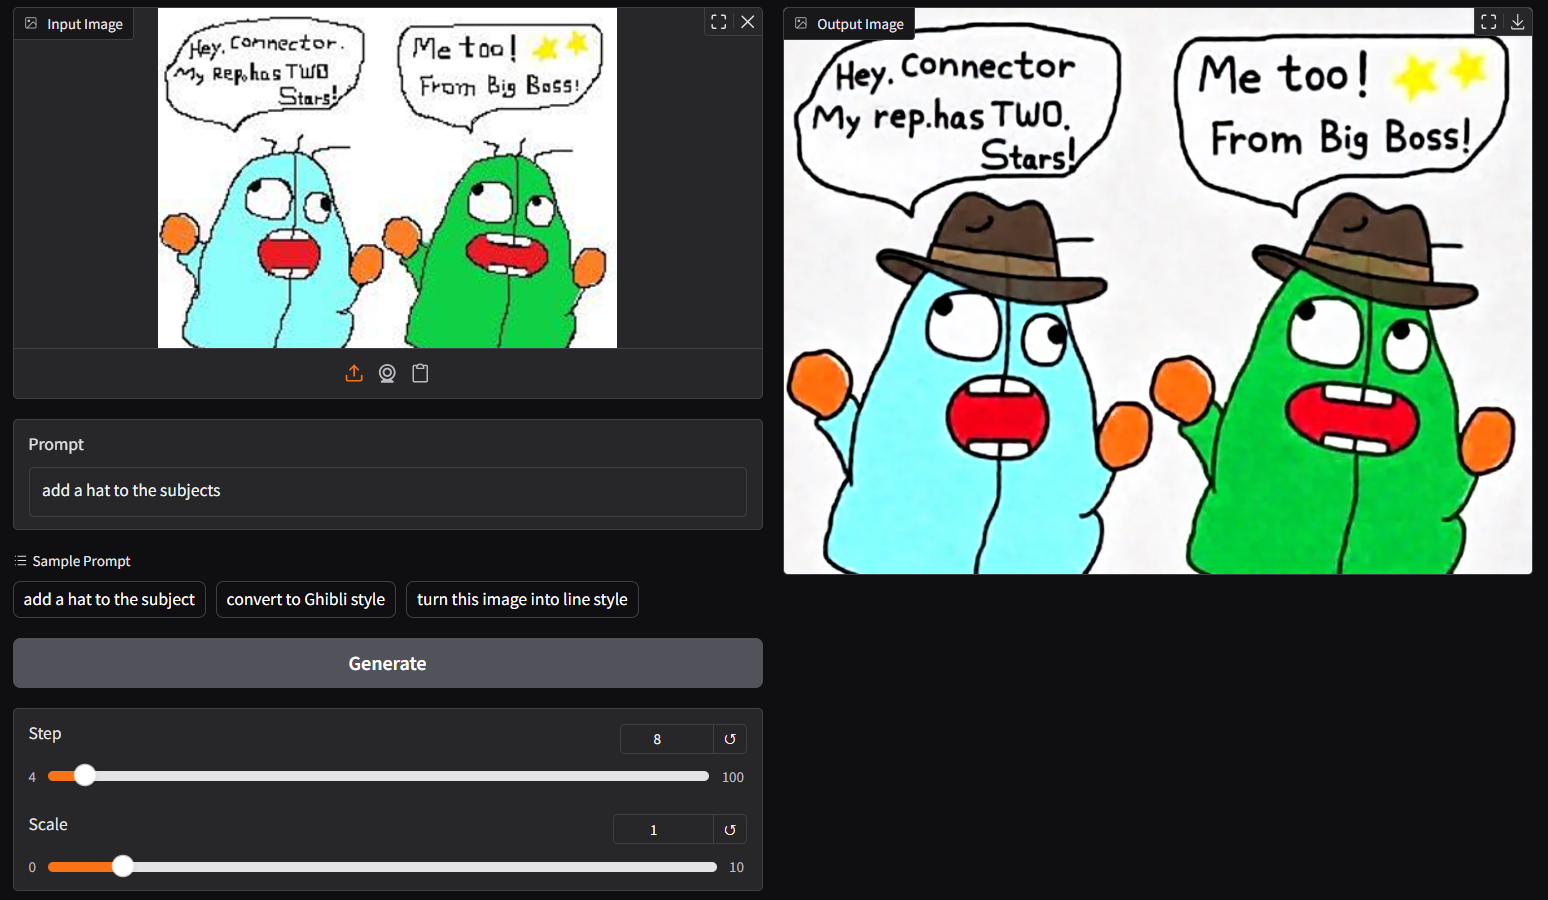
image = load_image("https://huggingface.co/datasets/huggingface/documentation-images/resolve/main/diffusers/cat.png")
prompt = "Add a hat to the cat"
inputs = {
"image": image,
"prompt": prompt,
"generator": torch.manual_seed(0),
"true_cfg_scale": 2.5,
"negative_prompt": " ",
"num_inference_steps": 20,
}
with torch.inference_mode():
output = pipeline(**inputs)
output_image = output.images[0]
output_image.save("output.png")
print("image saved at", os.path.abspath("output.png"))
run nunchaku safetensors straight with gguf-connector (experimental feature)
- run it with the new
q9connector; simply execute the command below in console/terminal
ggc q9
Safetensors available. Select which one to use:
- qwen-image-edit-lite-blackwell-fp4.safetensors
- qwen-image-edit-lite-int4.safetensors (for non-blackwell card)
Enter your choice (1 to 2): _
- opt a
safetensorsfile in your current directory to interact with; nothing else
 note: able to generate output with 4/8 steps (see above); surprisingly fast even with low end device; compatible with safetensors in nunchaku repo (depends on your machine; opt the right one)
run the lite model (experimental) with gguf-connector
ggc q0
GGUF file(s) available. Select which one to use:
- qwen-image-edit-lite-iq4_nl.gguf
- qwen-image-edit-lite-q4_0.gguf
- qwen-image-edit-lite-q4_k_s.gguf
Enter your choice (1 to 3): _
- opt a
gguffile in your current directory to interact with; nothing else
note: a new lite lora auto applied to q0 and q9; able to generate output with 4/8 steps; and more working layers in these versions, should be more stable than p0 (v2.0) below
- for lite v2.0, please use
p0connector (experimental)
ggc p0
GGUF file(s) available. Select which one to use:
- qwen-image-edit-lite-v2.0-iq2_s.gguf
- qwen-image-edit-lite-v2.0-iq3_s.gguf
- qwen-image-edit-lite-v2.0-iq4_nl.gguf
Enter your choice (1 to 3): _
- opt a
gguffile in your current directory to interact with; nothing else
run the new lite v2.1 (experimental) with gguf-connector
- for lite v2.1, please use
p9connector
ggc p9
GGUF file(s) available. Select which one to use:
- qwen-image-edit-lite-v2.1-q4_0.gguf
- qwen-image-edit-lite-v2.1-mxfp4_moe.gguf
Enter your choice (1 to 2): _
- opt a
gguffile in your current directory to interact with; nothing else
note: ggc p9 is able to generate picture with 4/8 steps but need a higher guidance (i.e., 3.5); if too many elements involved, you might consider increasing the steps (i.e., 15) for better output
