
Spaces:
Sleeping

Sleeping
| <img height="128" align="left" src="https://user-images.githubusercontent.com/51039745/222689546-7612df0e-e28b-4693-9f5f-4ef2be3daf48.png" alt="Logo"> | |
| # 川虎 ChatGPT / Chuanhu ChatGPT | |
| [](https://github.com/GaiZhenbiao/ChuanhuChatGPT/blob/main/LICENSE) | |
| [](https://gradio.app/) | |
| [](https://www.bilibili.com/video/BV1mo4y1r7eE) | |
| --- | |
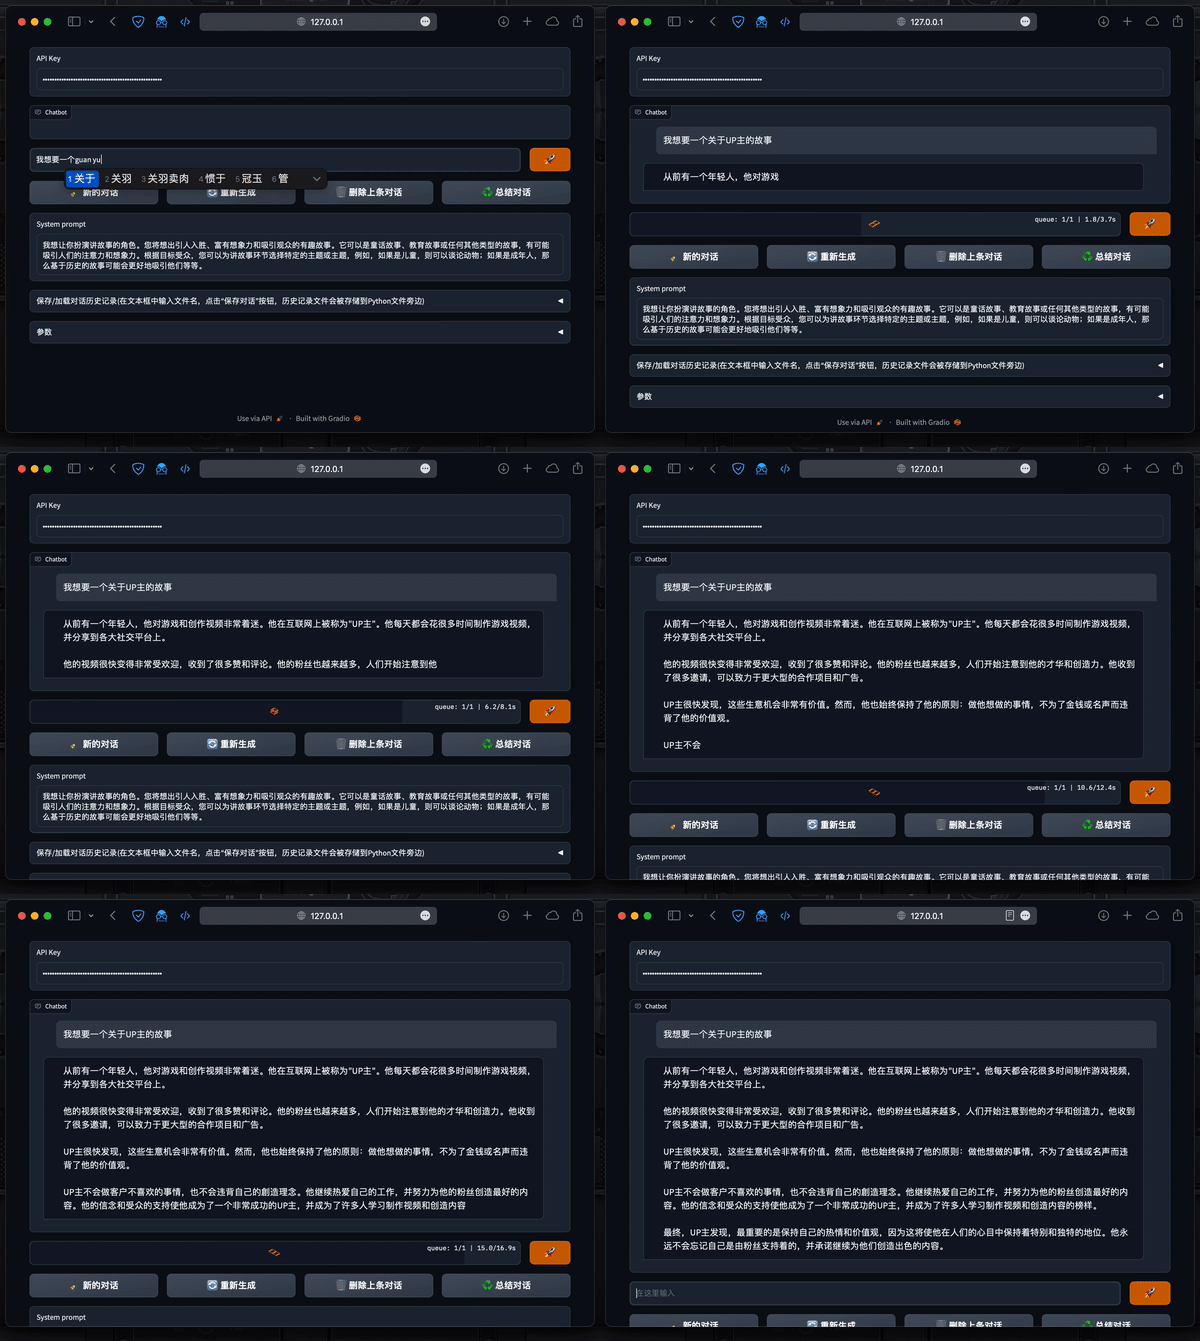
| 为ChatGPT API提供了一个Web图形界面。在Bilibili上[观看视频教程](https://www.bilibili.com/video/BV1mo4y1r7eE/)。也可以在Hugging Face上[在线体验](https://huggingface.co/spaces/JohnSmith9982/ChuanhuChatGPT)。 | |
|  | |
| ## 🎉🎉🎉 重大更新 | |
| - 精简了UI | |
| - 像官方ChatGPT那样实时回复 | |
| - 改进的保存/加载功能 | |
| - 从Prompt模板中选择预设 | |
| ## 功能 | |
| - [x] 像官方客户端那样支持实时显示回答! | |
| - [x] 重试对话,让ChatGPT再回答一次。 | |
| - [x] 优化Tokens,减少Tokens占用,以支持更长的对话。 | |
| - [x] 设置System Prompt,有效地设定前置条件 | |
| - [x] 保存/加载对话历史记录 | |
| - [x] 在图形界面中添加API key | |
| - [ ] System Prompt模板功能,从预置的Prompt库中选择 | |
| - [ ] 实时显示Tokens用量 | |
| ## 使用技巧 | |
| - 使用System Prompt可以很有效地设定前提条件 | |
| - 对于长对话,可以使用“优化Tokens”按钮减少Tokens占用。 | |
| - 如果部署到服务器,将程序最后一句改成`demo.launch(server_name="0.0.0.0", server_port=99999)`。其中`99999`是端口号,应该是1000-65535任意可用端口,请自行更改为实际端口号。 | |
| - 如果需要获取公共链接,将程序最后一句改成`demo.launch(share=True)`。注意程序必须在运行,才能通过公共链接访问 | |
| ## 安装方式 | |
| ### 填写API密钥 | |
| #### 在图形界面中填写你的API密钥 | |
| 这样设置的密钥会在页面刷新后被清除 | |
| <img width="760" alt="image" src="https://user-images.githubusercontent.com/51039745/222873756-3858bb82-30b9-49bc-9019-36e378ee624d.png"> | |
| #### ……或者在代码中填入你的 OpenAI API 密钥 | |
| 这样设置的密钥会成为默认密钥 | |
| <img width="552" alt="SCR-20230302-sula" src="https://user-images.githubusercontent.com/51039745/222445258-248f2789-81d2-4f0a-8697-c720f588d8de.png"> | |
| ### 安装依赖 | |
| ``` | |
| pip install -r requirements.txt | |
| ``` | |
| 如果报错,试试 | |
| ``` | |
| pip3 install -r requirements.txt | |
| ``` | |
| 如果还是不行,请先[安装Python](https://www.runoob.com/python/python-install.html)。 | |
| 如果下载慢,建议[配置清华源](https://mirrors.tuna.tsinghua.edu.cn/help/pypi/),或者科学上网。 | |
| ### 启动 | |
| ``` | |
| python ChuanhuChatbot.py | |
| ``` | |
| 如果报错,试试 | |
| ``` | |
| python3 ChuanhuChatbot.py | |
| ``` | |
| 如果还是不行,请先[安装Python](https://www.runoob.com/python/python-install.html)。 | |
| ## 或者,使用Docker 运行 | |
| ### 拉取镜像 | |
| ``` | |
| docker pull tuchuanhuhuhu/chuanhuchatgpt:latest | |
| ``` | |
| ### 运行 | |
| ``` | |
| docker run -d --name chatgpt -e my_api_key="替换成API" -p 7860:7860 tuchuanhuhuhu/chuanhuchatgpt:latest | |
| ``` | |
| ### 查看运行状态 | |
| ``` | |
| docker logs chatgpt | |
| ``` | |
| ### 也可修改脚本后手动构建镜像 | |
| ``` | |
| docker build -t chuanhuchatgpt:latest . | |
| ``` | |
| ## 部署相关 | |
| ### 部署到公网服务器 | |
| 将最后一句修改为 | |
| ``` | |
| demo.queue().launch(server_name="0.0.0.0", server_port=7860, share=False) # 可自定义端口 | |
| ``` | |
| ### 用账号密码保护页面 | |
| 将最后一句修改为 | |
| ``` | |
| demo.queue().launch(server_name="0.0.0.0", server_port=7860,auth=("在这里填写用户名", "在这里填写密码")) # 可设置用户名与密码 | |
| ``` | |
| ### 如果你想用域名访问,可以配置Nginx反向代理 | |
| 添加独立配置文件: | |
| ```nginx | |
| server { | |
| listen 80; | |
| server_name /域名/; # 请填入你设定的域名 | |
| access_log off; | |
| error_log off; | |
| location / { | |
| proxy_pass http://127.0.0.1:7860; # 注意端口号 | |
| proxy_redirect off; | |
| proxy_set_header Host $host; | |
| proxy_set_header X-Real-IP $remote_addr; | |
| proxy_set_header X-Forwarded-For $proxy_add_x_forwarded_for; | |
| proxy_set_header Upgrade $http_upgrade; # Websocket配置 | |
| proxy_set_header Connection $connection_upgrade; #Websocket配置 | |
| proxy_max_temp_file_size 0; | |
| client_max_body_size 10m; | |
| client_body_buffer_size 128k; | |
| proxy_connect_timeout 90; | |
| proxy_send_timeout 90; | |
| proxy_read_timeout 90; | |
| proxy_buffer_size 4k; | |
| proxy_buffers 4 32k; | |
| proxy_busy_buffers_size 64k; | |
| proxy_temp_file_write_size 64k; | |
| } | |
| } | |
| ``` | |
| 修改`nginx.conf`配置文件(通常在`/etc/nginx/nginx.conf`),向http部分添加如下配置: | |
| (这一步是为了配置websocket连接,如之前配置过可忽略) | |
| ```nginx | |
| map $http_upgrade $connection_upgrade { | |
| default upgrade; | |
| '' close; | |
| } | |
| ``` | |
| ## 疑难杂症解决 | |
| ### No module named '_bz2' | |
| 太空急先锋:部署在CentOS7.6,Python3.11.0上,最后报错ModuleNotFoundError: No module named '_bz2' | |
| 解决方案:安装python前得下个bzip编译环境 | |
| ``` | |
| sudo yum install bzip2-devel | |
| ``` | |
| ### openai.error.APIConnectionError | |
| 我是一只孤猫 [#5](https://github.com/GaiZhenbiao/ChuanhuChatGPT/issues/5): | |
| 如果有人也出现了`openai.error.APIConnectionError`提示的报错,那可能是`urllib3`的版本导致的。`urllib3`版本大于`1.25.11`,就会出现这个问题。 | |
| 解决方案是卸载`urllib3`然后重装至`1.25.11`版本再重新运行一遍就可以 | |
| 在终端或命令提示符中卸载`urllib3` | |
| ``` | |
| pip uninstall urllib3 | |
| ``` | |
| 然后,您可以通过使用指定版本号的`pip install`命令来安装所需的版本: | |
| ``` | |
| pip install urllib3==1.25.11 | |
| ``` | |
| 参考自: | |
| [解决OpenAI API 挂了代理还是连接不上的问题](https://zhuanlan.zhihu.com/p/611080662) | |
| ### API 被墙了怎么办 | |
| 建议把`openai.com`加入Clash等软件的分流规则中。 | |
| 跑起来之后,输入问题好像就没反应了,也没报错 [#25](https://github.com/GaiZhenbiao/ChuanhuChatGPT/issues/25) | |
| ### 在 Python 文件里 设定 API Key 之后验证失败 | |
| 在ChuanhuChatbot.py中设置APIkey后验证出错,提示“发生了未知错误Orz” [#26](https://github.com/GaiZhenbiao/ChuanhuChatGPT/issues/26) | |
| ### 重装 gradio | |
| 很多时候,这样就可以解决问题。 | |
| ``` | |
| pip install gradio --upgrade --force_reinstall | |
| ``` | |
| ### SSL Error | |
| ``` | |
| requests.exceptions.SSLError: HTTPSConnectionPool(host='api.openai.com', port=443): Max retries exceeded with url: /v1/chat/completions (Caused by SSLError(SSLEOFError(8, 'EOF occurred in violation of protocol (_ssl.c:1129)'))) | |
| ``` | |
| 请将`openai.com`加入你使用的代理App的代理规则。注意不要将`127.0.0.1`加入代理,否则会有下一个错误。例如,在Clash配置文件中,加入: | |
| ``` | |
| rules: | |
| - DOMAIN-SUFFIX,openai.com,你的代理规则 | |
| - DOMAIN,127.0.0.1,DIRECT | |
| ``` | |
| Surge: | |
| ``` | |
| [Rule] | |
| DOMAIN,127.0.0.1,DIRECT | |
| DOMAIN-SUFFIX,openai.com,你的代理规则 | |
| ``` | |
| ### 网页提示错误 | |
| ``` | |
| Something went wrong | |
| Expecting value: 1ine 1 column 1 (char o) | |
| ``` | |
| 出现这个错误的原因是`127.0.0.1`被代理了,导致网页无法和后端通信。请设置代理软件,将`127.0.0.1`加入直连。 | |
| ### No matching distribution found for openai>=0.27.0 | |
| `openai`这个依赖已经被移除了。请尝试下载最新版脚本。 | |